French Arm Chopper Refurb – Or the story of brown.

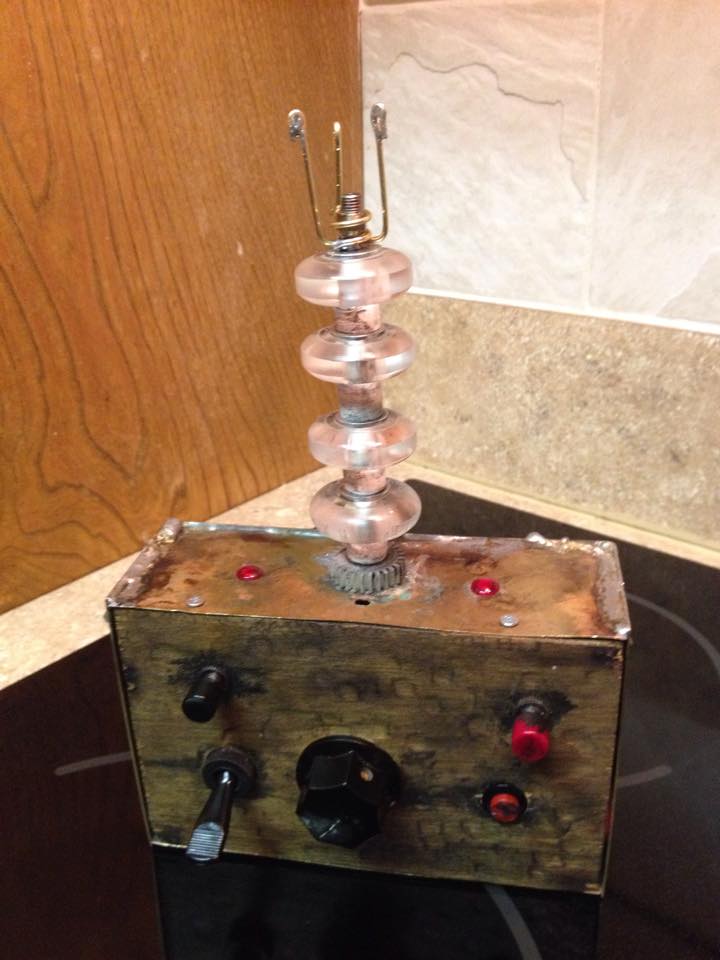
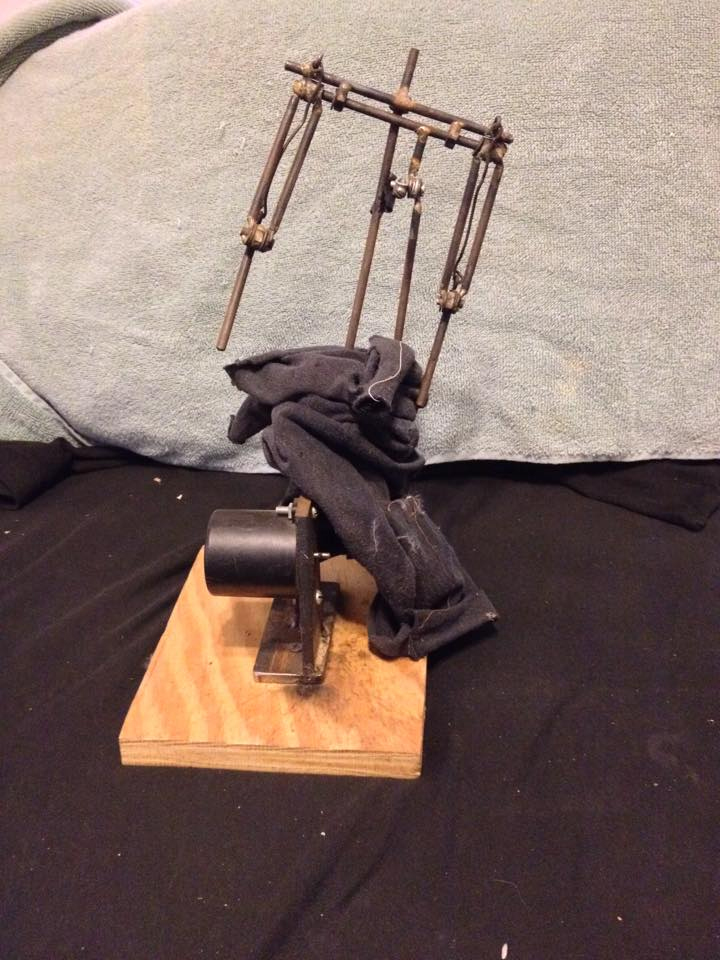
I recently rescued a MAK Magic French Arm Chopper from an attic, where it was rotting away and getting eaten by rodents. I fixed the broken pieces and gave the whole thing a new look. In doing that, I used a wood graining tool to do faux wood grain, and that’s what this post is really about.

If you look at the overall effect that the wood grain has, you will see that it looks real, but at the same time, it looks slightly off giving it a cartoon feel. It looks like some kind of decoration you would see at an amusement park, and that was done on purpose to take the edge off the macabre nature of the piece. There is a formula on how to give it that look, and how to make it look 100% real. This is the story of brown.

First thing to do, is to define what exactly what I am talking about. When I say color, I am referring to pigments, not light. For example, we all know that a prism will break up white light into the rainbow spectrum, and if you shine gelled spot lights of color onto one area, it will go white again, that’s the color of light, and that’s not what I am talking about. I am talking about pigments and the reflection of light. If you mix all the colors of pigments together, it doesn’t go back to white, like light does. It goes to.. well that’s what we are going to talk about. The reflection of light, as in pigments, and not the light itself or any filtering of light.

Starting with the basics… You have your primary colors. Red, Blue, and Yellow. You can not create those colors from any other colors. Next, you have secondary colors that come from mixing the primary colors. Red and Blue make Violet, Blue and Yellow make Green, and Yellow and Red make Orange. If you mix all the primary colors together you get???? White? No… Black? No… You get brown. Black and White are your primary shades, gray is your secondary shade, a mixture of black and white. You can not get a shade from a color, and you can not get a color from a shade.

If you look at the range of each secondary color, you can see the secondary colors fall on a spectrum between the primary colors. An orange can be a reddish orange, a yellowish orange, or mid range. Just like the violet can be more reddish, or more blue, and one of those is called purple. The same with the green, it can be yellowish or blueish. But when it comes to brown, a mixture of all the colors, the gamut of the brown can favor any of the primary colors, and since it’s also a mixture of primary colors to make secondary colors, brown can favor any secondary color as well. In other words, there can be a reddish brown, an orangeish brown, yellowish brown, greenish brown, blueish brown, and violet-ish brown, or whatever you want to call it, or an even mixture of them all.

Believe it or not, but colors have opposites, and they follow the brown color formula. Brown is the mixture of all primary colors, but it can also be looked at as one primary and one secondary color, which is the other two primary colors. Red and Green will make brown. That’s because green is yellow and blue. Same goes for Yellow and Violet, and Blue and Orange. They will all make brown, and they are also the opposites of each other. Notice how they fall directly across from each other. Red and Green are opposites, Blue and Orange are opposites, and Violet and Yellow are opposites. You can also test this. Take a white piece of paper, hold up a smaller colored piece of paper in front of it, stare for a minute or so, then remove the colored paper. For a split second or two, you will see the opposite color. That’s how those black and white pictures that look like color for a little while work. Notice the sky color is orange, and what’s its opposite? Blue. That’s a primary color, so it’s opposite will be a mixture of the other two primary colors, yellow and red, which make orange.

So why am I telling you all this? Well, if you notice, the color of wood is brown. That’s why, and if you want to give the wood grain that cartoon feel to it, use opposite colors of brown as the two colors that make up your wood grain. It’s as simple as that. In the real world, or as least as we see it, wood doesn’t come in opposite colors. If you want the wood grain to look 100% real, use different shades of the same color of brown, or don’t venture far from the spectrum, but this is about the cartoon look. You can use blue and orange browns, or violet and yellow browns. If you use them, Make the darker colors, blue or violet, as the dark base color, and their opposites as the lighter top coat of grain. If you use red and green, it really doesn’t matter which is the darker color and which is the lighter. Both are normal wood colors. Most wood either has a greenish tint or a reddish tint. Like cedar, it’s very red, where as wood that grows nuts is very green.

I chose blue and orange as the colors of brown for my arm chopper. I took some simple acrylic brown pain that was as much as the middle of the road I could find, and then mixed some blue into it. The idea was to get it a blueish brown, and not a brownish blue. It should just have a hint of blue to it. Any other darkening comes from black, which only changes the shade, not the color. Once I achieved my blueish brown color, I painted everything that was going to get the wood grain. I did orientate the brush strokes to the direction the grain was going to go.

Once that dries, it’s time to do the actual wood graining. You will need a wood graining tool. I got mine at Lowes. They have them some times, but you can just google them, and you will find several different types. The actual one I use is called the “Plaid Wood Grainer – 30114”.

For the top coat of paint, I went with the opposite of my blueish brown. I took my middle of the road brown and this time I added orange into it, and some white to lighten it up. I created a light orangeish brown color. I won’t go into technique of using the tool. There are plenty of resources for that. I am just teaching what colors of brown to use. But the way I do it, is to paint the tool with a thick coat, run the tool across the wood, and keep doing it until I get a pattern I like. Different movements cause different patterns, and you have a few chances to get it right before the paint dries. So move fast and keep trying.

Once everything is dry, it’s time for some detail. This is the fun part, because you get to see it come to life. At this point, I take a small artist paint brush and paint black lines dividing up all the different pieces of wood. I also added any cracks, knots, or dark spots I want. Then I water down the black paint a little and create a wash. I go over my black lines which blurs them out and makes them not so harsh. I also use it to dirty up the wood. If you water it down too much so it barely shows up, that’s fine. You want to do this very light, and build up the darkness. It keeps you from messing up, it allows you to see where it’s going, and it makes it easier. It takes longer, but this is the fun part, so who cares? Keep going over and over until it looks good.

After the graining work is all done, all the detail is done, it needs to be finished off with a clear coat. This does several things. For one, it protects the art work. Imagine if you will, that I came to your home, and wood grained an entire illusion for you at no charge. As I leave, after doing all that work, I say, “now go get a clear coat to put over it”… If that happened, you would probably do it. Right? Yeah, I agree. It’s pretty stupid not to. If I did that for someone, that person should listen to me.. but I digress…

I like to use a matte finish. A clear coat on the grain is like putting a magnifying glass coat on it. Everything pops. It’s night and day. If you think the wood grain looks good, wait until you see it after the clear coat. And if you use a matte finish, you don’t have to worry about glares from stage lights. A clear coat is a must.

So in conclusion… Brown is a mixture of all primary colors. Colors have opposites based on the brown spectrum. Use opposite colors for a cartoon look and like colors for realistic look. Always clear coat.

Four String Fender Telecaster Clone

I used to play the guitar a long time ago, but was never really good at it. Then years later, I picked up the ukulele, and for some reason I was actually pretty good. I never really understood this until I came across Justin Johnson’s facebook page. He plays three and four string guitars, and even one string diddley bows. On one of his videos, he talked about how he was a professional guitar player before he even picked up a four or three string, and when he did, it made him a better player. He says it was because it broke habits. That makes total sense. It explains how I was all the sudden better. So he inspired me to make my own four string guitar, and this is how I did it.

The first thing I needed was the neck. Now you can buy necks already made, but I wanted a Fender clone, and that I couldn’t find. That meant I had to make my own, which I have never done. I also don’t have a plainer or a joiner, so I needed some flat stock that was ready to cut. Luckily, the place I buy my exotic wood from has just the thing. Belle Forest Products sells all kinds of wood, and wood cut especially made to make guitar necks from. I bought a nice people of maple and cut it out myself. It was already perfectly flat and square. All I had to do was cut it out. I used a band saw for the curves, a router for the truss slot, and a table saw for everything else. One technique for cutting non-parallel sides I used, was to run a piece of plywood through the table saw, but don’t move the fence. Then using double stick carpet tape, I secure the piece down along the cut edge, and run the plywood through again. It will cut exactly where you need it.

Guitar Neck

I purchased a neck truss off of ebay. It came from a Canadian company and is double action. It was something it really needed too when it came time to work the action of the strings.

The fret board was something I purchased, even though Belle Forest sells wood for fret boards too. I just didn’t have a way to make the cuts for the frets. It takes a really thin saw blade and has to be pretty precise. Other than the hardware, this was the only piece I didn’t make. Even though the fret board didn’t come with the frets mounted, and it was too wide. I cut it down to size using a flush trim router bit along the neck. The inlays were just holes drilled, filled with blue plastic, and sanded down. The truss rod was epoxied in at the ends, and the fret board was glued down. The frets were installed, and then sanded down flat using a piece of sand paper on a block of flat MDF. The neck doesn’t have a curve to it like some six strings do.

Once the neck was done, it was time to work on the body. A simple google search finds a Fender Telecaster template.

telecaster template

First thing to do was to cut it out on a piece of wood. I used a piece of 1/8″ craft plywood. It was cut out using the band saw, but that was hardly perfect. Once cut, it takes a lot of sanding to get it smooth. This is why I used 1/8″. The thinner it is, the less you have to sand.

Once I had the smooth template, I traced the shape on several pieces of plywood, and a piece of 1/4″ MDF. I rough cut the pieces out, leaving the line. Then I used more double stick carpet tape to attach the template on them. With such a thin piece of plywood used for the template, I had to use some spacer pieces to rise it up. That’s because I used a flush trimming router bit to finish the job. It had to be bumped up so that the bearing could ride against it and still cut the wood.

Once the pieces were cut, I cut out the center plies that would house the electronics, and the sections that would hold the neck. Then I stacked them all up, with the 1/4″ MDF on the face, and I glued them together under pressure. Once dry, I used a round over router bit all the way around.

guitar body

I really hate sanding, and I didn’t even want to try to get the edges of the plywood smooth. So I covered the entire piece with resin. This was just fiberglass resin. It soaks into the wood and makes it way more easier to get smooth than raw end grain wood. I learned from the electric ukulele, that I built, that it most definitely needs a primer. Paint doesn’t want to stick by itself. It was primed and painted with automotive paint from O’Reilly’s Auto parts. They have spray can lacquer.

At this point, there was just one more part of the body to make before it was time to install the hardware, and that was to make the pick guard. Since mine was going to be a four string, and the neck was thinner, I shrunk the size of the body to match the scale. That meant I couldn’t just buy a pick guard. My color scheme was black and blue. I purchased some blank pick guard material from Stew Mac.

The pick guard had to be a half inch smaller all the way around than the body. There is a really simple way to do this. First thing, was to make a copy of my body template on another piece of wood that was 1/4″ thick. I did this just like I did the body. Rough cut and flush trimming. Then I took a dado router bit and I cut a half inch dado around the piece of wood. Then I used a flush trimming bit to remove the dado, and TADA! The body shape that was perfectly a half inch smaller all around. Then just more double stick tape to hold the blank pick guard down, and I flush trimmed it out. Then I chucked up an angle bit, and I put a small bevel on the pick guard before I pulled it off the template.

pick guard template pick guard template

One more thing I had to make, and that was the nut. I didn’t want a white one, it had to be blue, so that meant making my own. To do that, I modeled it on the computer. Printed it out on my 3D printer. Made a mold of it, and cast it in blue plastic. Probably the easiest part, and one of the coolest. Everyone asks where I got it from.

Now it was time for the hardware. Where do you get parts for four string guitars? Believe it or not, there is a company just for that. It’s also where I got the fret board from too. It’s a place called MGB Guitars. They have some really nice pieces, and they’re not that expensive either. Along with the fret board, it’s also where I bought the humbucking four string pick up, the bridge, the electronics, the jack, the tuners, the strap knobs, and really cool string retainers. I am all super happy with their products. The only thing I didn’t like, was the look of the pick up. It sounds great, but it’s uglier than homemade soap. It kind of looks like wood, so it kind of matches the maple neck, but it’s still not my favorite part.

That’s it. I hope this helps anyone that wants to build their own, or anything similar.

Four String Fender Telecaster Clone

Model Gondola by Randi Rain

If you have read these blogs, you might be surprised that as a child, I liked toys. Yes, I know. Shocking isn’t it? But it’s true. I was a big toy player as a child. The reason, I believe, is even though I wasn’t an only child, my brother and sister were older than me. Which meant that I had to entertain myself quite often.

When I was younger, there was a store at the local mall called “Toys By Roy”. I looked it up online, and all I can find is that they no longer exist, they started in 1972, and it was a company from Lubbock Texas. It was always an interesting place. Not your typical toy store. It was a store with the really “cool toys”, that I couldn’t afford.

One day while walking through the store, they had a model gondola in there that spanned the entire store. You could buy one, put it together, install it in your home, all for way more money than I had. It was something that always fascinated me. I wanted one, but I knew I couldn’t have afford it, and I also knew I could build one myself.

Even as a child, and I am talking even before High School, I built all kinds of things. I once built a miniature roller coaster out of flexible model train tracks and Popsicle sticks. One of my most proudest moments as a child. It was something so special, I even have pictures of it. The name of the roller coaster was “The Wild One”. Maybe not the best name for a ride that only goes up a hill, down, around, and over, but I was a kid. Here is a photo of “The Wild One”.
The Wild One - Miniature Roller Coaster

For some reason, I decided to build the roller coaster on top of a bookcase. A smarter idea would have been to build it on a board, and then just put it up there. For some odd reason I thought it was more fun to stand precariously on a desk to build this thing. It was very hot up there too. I took a trash bag and funneled the air conditioner vent straight on me. That worked great. I so remember that.

Of course, if you were a miniature person that wanted to ride the roller coaster, you couldn’t get to it. It’s on top of a bookcase. There was only one real solution, there had to be a gondola to take people there. When I saw the toy gondola in the toy store, it all made sense. Unfortunately, there are no pictures of the gondola. It really didn’t deserve pictures, nothing more than a wooden box. I did however catch the pulley and string in a picture of the roller coaster. Look at the far left.

The Wild One - Miniature Roller Coaster

I don’t remember where I got the plastic pulleys I used to make the gondola, but I can pretty much guess that the motor came from a broken hair dryer. Most of the time when a hair dryer breaks, it’s the heating coils. The motor rarely breaks. We seemed to have many broken hair dryers in the house, obviously, because I had a collection of motors. I used a model train power supply to turn the motor each direction. With the fast dryer motor, and the train power supply, you had to be careful not give it too much power. If you did, it would shoot across the room and smash against the wall.

The little gondola never left my thoughts throughout all these years. My skills have vastly improved in the last thirty five years, so it was time to build another one. It became a day project. Something to make the world a little better place, something to share with the world, and something to kill some time.

It started with modeling the whole thing on the computer. This probably took the most time. Some of the pieces I rushed through, but time was taken with others. I tried to make it look like the one I remember from the toy store, all those years ago. Once I was done, I printed it out on my 3D printer. The best investment I ever made. If you have access to a 3D printer, and you want to make a gondola, you can download the files here.

Printed up, I glued the pieces together and gave them some paint. My “Toys By Roy” gondola clone was complete. I remember the original had more black on it, but I didn’t want that. It was going outside, in the sun, it didn’t need to be black. Instead, I went with a silver, that came out more grey. Here is a close up of mine.

Miniature Gondola

 It was time to motorize the little fellow. I just bought some geared motors just the other day at my local electronic store, Tanner Electronics. These motors are nice motors with a durable metal gear box, with metal gears. These are plenty strong. A motor support, and pulley system was modeled and printed out. This is the motor and support, but I changed the pulleys. They were too big, and the idle pulley was not right. Then again, this was made for something else at first. If you would like to print the pulleys system out as well, the files are here.

Gondola Motor Pulley system

With everything done, it was time to install the model gondola in the garden. It spans from the house, across the yard, and ends at the tool shed. I think it’s adorable.

Model Gondola

To make the model gondola travel back and forth, you have to reverse the electricity to the motor. This is really simple to do. You only need one thing, a DPDT switch. That’s a double poll double throw switch. Put the motor terminals to the two commons on the switch. Then on the normally open side, put it negative/positive. Then on the normally closed side, put it positive/negative. Throwing the switch either way will reverse the polarity. I used a switch that has a no connection middle position for it to stop.

That’s it. I hope everyone can make their own. If not, take a virtual ride on mine.

The Quintessential Lie Detector – by Randi Rain

If I had to guess the one prop I have been asked most about making, I would have to say it is a gag lie detector. Many entertainers have inquired about having one built, but it was a prop that I never accepted the challenge of making until now. The reason, I wanted to make the quintessential lie detector and make it affordable. Something that I have never been able to do until now. This also meant not doing what others have done, which is, making them out of an already existing device.

I won’t go into any detail about anyone else’s product, but they really aren’t lie detectors in the way we think of them. They’re magical items that can supposedly detect a lie, but they’re not what we call lie detectors. They are just not the quintessential lie detector that you think of when you think of a lie detector. Which is what I wanted to make, and what I have made.

Others have been made that are more in the lie detector category, but they all had  major problems that made them impractical. They were either not loud enough, or the buzzer was not good, or they cost an enormous amount of money. These three are all related, and is what I mostly tried to tackle with this prop.

When building something like this, a simple way to make a buzzing sound is with a piezo buzzer. When you put electricity onto the buzzer, it makes a buzzing sound, but here’s the problem with that. Voltage determines the buzzers volume. The more volts, the louder it is, but… also, the more volts, the higher the pitch it is. Smoke detector alarms are usually piezo buzzers, and you know how loud and how high pitch they are. Using a piezo doesn’t work, because the only way to get that deep buzzer sound, is to have it at a very low in volume.

The iconic “lie” buzzer sound is the whole ball game. If you don’t have that, you don’t have anything. When we think of a “lie” buzzer sound, we think of that deep game show buzzer sound. The only option is a recording of a game show buzzer. A digital recording of a game show buzzer. That also means that the iconic “ding” sound, for truth, is going to have be a recording as well. That’s two different circuits for the digital recordings. The first obstacle to cross in keeping the price down.

Just like the piezo, the digital sound circuits aren’t loud either, but at least there is a solution for this. That’s what amplifiers are for. Then again, that also brings up that major stickler point, the price. So far, with just the sound requirements, I was already up to two digital recording boards and an amp. It started off with a challenge to make it affordable.

It took me awhile to find the necessary electronic parts for a workable price, but I did. The next part was building this whole thing. If I had to go out into the shop and make each one of these from scratch every time, the price would sky rocket. Instead, I opted to just build the pieces once, make a mold of them, and then cast the multiple pieces in plastic. That also meant I could do all the art work at the same time. The molds were an investment, but it will save me loads of time making them. Which helps with the budget.

Back to the quintessential part of it, getting the appearance correct. I looked at it like this. When an artist paints a landscape, and paints the happy little clouds in the sky, the artist paints what we think clouds look like, not what they could actually look like. Clouds are just water vapor. They can take on any shape, but if you don’t paint them right, they won’t look right. Even though they could totally be that shape. A cloud painted wrong just doesn’t look real. My job was to create the quintessential lie detector that looks like what people imagine a lie detector looks like. At the same time, I wanted it to look like what a cartoon lie detector would look like in real life. For that, there is only one source to go to… The Simpsons.

Simpsons - Lie Detector

Big red and green lights were a must, and they had to have that “look”. I was imagining that old glass fixtures for railroads look. The rest is pretty much doodads and displays to fill in the space. Now of course, you may be wanting to point out the paper with the scribbles marks. I so tried to incorporate that into the prop, but no such luck. I thought about having a paper conveyor belt that passes by a window to have the squiggles. Unfortunately, with the motor and all, I couldn’t ever work it into the budget. I thought about doing it with lights. Instead I opted for LEDs that blink like an input level. That’s good enough. After all, today, real polygraphs are all on the computer and there are no moving arms and paper. Everything is always a give and take.

The needed look has been achieved. It gives it enough realism to be serious, and enough cartooning to be fun. I did however add in a little convincer to it. I did want to give it a little realism. You still need to get that apprehension going. I did that by making the head piece plug the power switch.  There is no on and off switch to this thing. Plugging the head piece in turns it on.

My thinking, is to show the head piece to the volunteer, show the plug, show where the plug goes in, hand them the plug to hold, put the head piece on them, which takes time, and then act like you forget about the plug and go fiddle with the box. The idea is to act like it’s not working and you can’t figure out why. They will either notify you that they are not plugged in, or you act like you finally figured out what’s wrong. That’s when you grab it away from them and plug it in. You could have them plug it in if you want, either way, static noise starts followed by some computer type sounds. With the plugging in, the sounds, the flashing LEDs, it’s all a little cerebral nudge towards realism.

As for the head piece, it had to have the right look too. It also had to be something that I could build fairly easily in order to keep on budget. This seemed to all work out really well. The head piece is one of my favorite parts.

I wanted a curly cord, but I also wanted various colored cords. I got both. The head piece needed to be made from straps. It should also look as to have some sort of sensor inputs on it. All was achieved with a pretty heavy duty quality result. The straps are nylon webbing that have been riveted together. The rivets make great sensor looking nubs and are extremely durable. Along with some velcro to make it adjustable, and some 3D printed pieces to connect the cords, The head piece came out very nice.

 quintessential lie detector Head Piece

A bi-product of the other so called lie detectors on the market, has been people asking me if it’s remote control. The answer to that question is no. This is not a magic trick. The quintessential lie detector is a comedy prop. It’s not magically detecting lies. The quintessential lie detector is a machine that in real life you would have to operate. In real life, you wouldn’t work hands free from the machine. Extra knobs that click were added just to give you things to mess with. There are two buttons that set off the lights and sounds, and secretly pressing them is no big in the confines of the operation of the machine. That is the reason a remote was not added. That, and the fact that it would double the price.

So, what is the price that I got the quintessential lie detector down to? Some other examples on the market go for over a grand, and they aren’t even the quintessential lie detector. The size is hard to tell from the pictures, but the actual dimensions are… 11″ x 7″ x 3″. It’s bigger than you think it is. So what is the price? Believe it or not, I can make these for $300. It took years keeping my eye out, thinking about ways, and learning new techniques to get a quintessential lie detector for that price.

I hope there are some entertainers out there that can benefit from my hard work. I already have my routine idea I am working on.

Get yours custom made at Raincloud Magic.

 the quintessential lie detector

Hare and Bird Superposition

I created the Hare and Bird Superposition magic trick. You can get it at Raincloud Magic.

I can’t actually remember how the idea got started in my head. Sometimes I do think about old tricks and see if I can revamp them, so that might have been it, but I guess it doesn’t matter. The story is that one time, alright I confess.. one time sitting on the toilet, I got to thinking about the Hippity Hop Rabbits magic trick. It’s such a classic, and I had to wonder why. The reason has to be because it’s a sucker trick. They always play well. It’s built-in entertainment. It sure isn’t because of the look of the trick.

I can remember going into the magic shops as a kid, which is actually getting to be a pretty long time ago. Back then there wasn’t all these Chinese knock offs, there was actually quality on the shelves. The ones during my time were mostly made by MAK Magic. Back then they actually made their own products. I can remember those black and white rabbits sitting on the magic shelves. They had really big ones, and small ones, medium size ones. Some that had a wire across the ears, some that didn’t. The thing is, even as a child, I still remember thinking the black rabbit with the white outlines didn’t look right. It looked like a negative.

Then I got to thinking about an Indian set that had the imagines of the rabbits turned a little. They weren’t straight on, they had some character, and the cut out was asymmetrical. It still had the black rabbit with white outline, but the rabbits had a little more character than the usual straight on ones. I thought that was an improvement. It also had a way to steal off the shell piece without having to put your hand inside the box. I liked that too, but to show the box empty you did have stick your hand inside to hide the hook. But the main thing, and every version has it, is the lame finale. It’s different colored rabbits, which makes no sense. That’s when I began to try to make something out of my thoughts.

I first thought, that instead of different colored rabbits at the end, to have different animals. Then I thought about the asymmetrical profile of the Indian version, and I thought it would be interesting to fit different animals into a single outline. That’s when I thought about that ugly black rabbit with white outlines and thought it too should be another animal. Then I thought about what other animal should it be? What other animal do magicians use? The answer, birds. That’s when it became a rabbit and a bird, and then it dawned on me. Rabbit… bird… What about the rabbit and duck illusion? That’s when it fell all together.

I now needed four different animals that could work with the same outline. The first thing I did was to find a rabbit. I searched the internet and the one I liked the best was actually Thumper. Then I found a bird that would kind of work, then I found a goat. At that point, that’s all I could find. I then started taking those images and stretching them until they matched the same outline. Of course, by now the images were all distorted, but I never planned to use them. They were just to get an idea. At that point, I started tracing over them and creating my own versions on top of them. I did this with vector graphic software. That way I could scale it to any size without any quality loss.

I now had three cartoons that all had the same outline and I needed one more. I couldn’t think of any, so that’s when I hit facebook. I posted the images I had and asked if anyone could come up with another one. I got two responses. I feel bad that I can’t remember who sent me the turtle image, but if you are reading this, I did like it, and I still think sometimes of replacing the goat with it. The one that I went with actually came from my friend Scott Klinger. He drew out a rough sketch of a dog, and that was perfect. That’s when I did the same thing to it I did with the others. I traced over it with vector graphics software and made the dog.

Now I had to create the parts. Such a good idea needed some quality too. So I went with birch plywood. I used quarter inch for the main pieces, and eighth inch for the shells and boxes. The main thing is the characters. I drew the outline on an eighth inch piece of Masonite, and I cut it out. I wanted to do it on a thin and sandable piece of wood. That way I could smooth out all the rough cuts of the piece. Once I smoothed it all out, I used it to cut a half inch piece of plywood with the router, and that piece became my template. I used that template to route out all the pieces needed.

The boxes were just simple boxes, but they needed to have a hook in them and the inside covered with felt. I decided to make the hook all the way across. That way you don’t have to cover anything up with your hand. It just looks like the edge of the box. The hook is made out of brass plate, as is the hook on the characters. Both the brass plate and the felt has to be put on before the boxes are assembled.

Once the boxes are made and the cut outs are done, I blacken the edges with paint, and it’s time to put the labels on. I just have the labels printed at the local Staples. With the characters, I have to put them face down on a light table and place the template on it and trace it. If not, it’s impossible to get them on straight. I use spray glue 77 from 3M, and I use it as a contact cement. I spray the cut out and I spray the back of the label. Then, I get one chance to place the cut out on the label. That’s why I draw the outline. I learned real quick not to try to put the label on the cut out, but to put the cut out on the label. Doing the boxes are much easier.

Once the labels are on, they have to be trimmed. I use a razor blade. I slice around it, but I can only get so close. Not to mention that it’s rough. So I have to go around and sand the edge to trim the label paper flush. Now that leaves a white edge all around my painted black cut out edges. That means I have to go around with a marker and blacken it out. I must be very careful. One slip and their is a big black mark across the character. Have I done it? Yes. The only thing to do is to sand off the label and put another one on. It’s better just to take my time and be careful.

Once the labels are done, the boxes are together, the white edge is blackened out, I clear coat them all, and then I make my favorite part of the whole thing. It might not seem like much, but it really is, and that’s the base. Other versions have a large oversized base to keep them from tipping over. I wanted to avoid that, and the only way to do that is to make the base heavier. I made a base, made a mold of it, and now I can cast them in a mineral filled resin. The heaviness makes them smaller and allows the boxes to cover up the bases, and I just really like that. It helps everything. It looks better, and it’s even better for storage. Designing is always hard, and when I can’t figure out what color to use, I always take a left turn and go with a metallic. That’s why the bases are silver color, it’s neutral and it works. I just really like the bases.

That’s how the Hare and Bird Superposition came to be and how they come to be when I make them over and over. As for the name, what else am I going to call it? As I played around with some sort routine, I started thinking about quantum superposition’s where something is in two places at once. Rabbit and Bird didn’t sound very good, so I went with Hare. That’s the story, and that’s what it takes to make them. It’s actually one of the pieces of magic I am most proud of. I’m hoping it’s something that will go down in magic history. It always helps when magicians buy them. Hint Hint. You can get them here, if they are in stock… Raincloud Magic

Hare And Bird Superposition

Animatronic Zombie Door

What a cool project, and a nice story. I would imagine if you study this close enough, you could look into my soul. It all started with friends that own a portable haunted house. I won’t go into detail about it, because I don’t know how much they want me to expose, but they wanted an animatronic zombie door.

EDIT: They very much want me to let people know..
Amazing Attractions – The Haunted Halls / A Haunt For Hire

Okay, so that wasn’t a zombie. That was me, but that was just a test video for the door. Any way…

They showed me a company that makes these kits where you can make these types of doors, and other Halloween props. I’m not going to link to them, of course, but they do have very cool stuff. They showed me this one door effect they had and asked me how much it would cost to build one. As I looked it over, one thing was clear, the website doesn’t give you very much information. They don’t explain how anything works. You don’t really get all that information until you buy the kit. Because of that, and their prices, I would have to charge the premium to build one. As you can guess, it wasn’t a very appealing proposal.

Now of course I knew how all the animatronic props worked. I didn’t really need their kit to make one, but I did need to know more information on what I was getting before I bought their kit. Which was annoying, because that makes it really hard to give someone a price. So I decided to tell my friends how I would build one myself. My way works the exact same way as theirs does, I just used standard equipment and built the rest from scratch, and I am about to tell exactly how I did it.

One last thing before I tell you how I built the animatronic zombie door. The other company doesn’t want you to know. They are very vague on how it works. Other people have told me not to tell how I built it, but I disagree with the secrecy. First, the people who can build one already know how it works. I didn’t need anyone to tell me how they work. I have been using this technology for animatronics for a long time. Disney invented this stuff before I was even born. So, I am not giving anything away. I am just showing the behind the scenes, and everyone loves that.

The whole thing runs by the video that plays. The video is what controls everything. You program the door by the video. The video is going to be a zombie banging on a door. That video goes to a monitor that acts as the window in the door. The audio, of the video, is split up left and right. The right track holds the audio of the zombie banging and is meant to be ran into a sound system. The left side holds DTMF tones. The tones are how you program the door and what makes it work. For those who don’t know what DTMF tones are, it stands for Duel Tone Multi Frequency. Basically it’s a set of paired tones. Think of playing two notes at the same time. It’s a set of two notes played at the same time. Confused? It’s the tones your telephone uses.

The video is being played by a very simple HD video player that cost $30 on ebay. It allows SD card and USB input for videos and has HDMI and AV outputs. It’s actually a pretty neat little device. It does what it’s needed to do.

video player

The DTMF tones on the left side of the audio track are used to control the animatronics. There is a specific microchip that is made just to detect the different DTMF tones. Companies take these chips and make DTMF decoder circuits with them. You can buy these things for under $20 on ebay. The circuit that I used had a 1/4″ audio socket for the input and needed twelve volts DC to power it. The output, from the detected tones, comes in the form of binary from four pins. If you know binary, you would know each pin has a high and low, which means two different states. So, that’s two to the power of four. Two states, four pins. That’s two times two times two times two, which is sixteen. Which is how many different sets of DTMF tones there are. Which means sixteen different controls are possible.

DTMF decoder

Sixteen? You may be thinking. “On my phone.. There is zero through nine, star, and pound. That’s only twelve.” Well, there is a rare A, B, C, and D too. The main thing to understand is that the output is going to be in binary. The four output pins are going to be going high and low in different patterns that will have to be parsed. Some DTMF decoders have this logic built in to evaluate the binary, but this one didn’t. I decided to make my own. I used my favorite way of programming electronic chips, and that’s the Picaxe chips. Cheap and easy to work with. I programmed the chip to detect six different binary patterns, because that’s all I needed. I also went with the easy ones. They turned out to be 1,2,3,4,8, and #. Those are the tones that I use to program the door.

 So why six tones? Well, one.. the actual 1 tone, is used to turn on the siren beacon. The 2 tone is used to activate the left hand special effect. The 3 tone is used for the right hand special effect. The 4 and 8 tones turn on outlet sockets that can be used for auxiliary effects such as lights. The # tone turns all that stuff off and resets the hand denting special effects. All of that was programmed on the Picaxe chip.

Zombie Door Brain

The activation of the siren beacon and the auxiliary plugs are turned on by relay switches. That’s what those white things are in the picture above. When the Picaxe chip detects the signal to turn on one of them, a pin on the chip goes high. This turns on a NPN transistor which turns on the relay. The relays turn on the beacon and the auxiliary plugs.

The denting special effect is basically an arm moving and stretching out a piece of spandex. The spandex is painted to look like the rest of the door. The arm that pushes out the spandex is connected to motors. The motors I used are car window motors. They are a worm drive system which makes them extremely strong. Easily powerful enough to push on some spandex. The arm has to go down and go back up, which means it has to go forward and reverse. This is accomplished with relay switches, which I will explain. It also has to stop at certain points, this is done with limit switches.

The easiest way to make a motor go forward and reverse, is to use a DPDT switch. A DPDT switch is a Double Poll Double Throw switch. It’s basically two switches in one, with two commons, two normally closed, and two normally open. Hook the motor leads to both commons of the DPDT switch. On the normally closed leads, make one positive and one negative. On the normally open, do the reverse. So, now the switch will make electricity flow one way, and the other way when the switch is flipped. DPDT switches can be manual, or they can me electric like the ones I used. Just like the relays that turned on the beacon, these turn the motor one way when on, and the other way when off. Here is a basic sketch of the schematics.

DPDT Motor reverse schematics

 To get the animatronic arm to stop in the right spots, limit switches are used. On each side of the DPDT relay switch I added limit switches that break the current when pressed. That way, when the arm moves to the right spot, it hits the limit switch turning itself off. It won’t do anything until the DPDT switch is thrown the other way, which causes the motor to turn the other direction. This will let up that limit switch and stop when it hits the other one. A real simple back and forth movement.

Dentin Special Effect Dentin Special Effect

 The basic structure of the zombie door is white pine 1×4’s and half inch MDF. A simple ‘two foot center’ frame structure was built with 1×4’s. The white pine is nice and light and plenty strong enough. Glue, always use glue. Glue every joint, nail it all together. I used a nail gun for the frame and a staple gun to attach the MDF. If you don’t know what MDF is, it stands for Medium Density Fiberboard. It’s basically wood made out of old other wood, and some other stuff. Who knows what’s all in it. It’s not unheard of to see a spark when cutting MDF. There could be bits of metal in it. There is actually different types of MDF, there are different densities. There is ultralight MDF, which is nice, because MDF is heavy. I have never seen ultralight MDF outside of Hollywood though. You sure can’t get it in Texas.

Zombie Door Construction Zombie Door Construction

MDF can be painted to look like anything you want. MDF doesn’t have a grain to it. It’s nice and smooth and flat. You can paint it to look like marble, and it will look like a slab of marble. I, of course, wanted to make it look like metal. Ugly metal at that. This is the easiest paint job there is. It’s metal colors and dirt colors. You can’t mess it up. It’s the little details that you want to work on. Such as the rivets and the weld marks. I made the rivets. They are plastic that I poured and tinted with metal tint. The weld marks are just caulk. That’s my favorite. So simple. Just caulk and paint.

Zombie Door Paint Zombie Door Paint

I built the media player into the set piece itself. The media player runs from a remote control. That means the media player has to be in a position able to receive the infrared signal. It also has to be accessible to plug the SD card or USB card into it. That meant I had to build it into the set. Since it is electronics, I needed to hide it in some electronics. I decided to build something that looks like some security lock or something. I went with the card swiping look. It’s just more MDF made to look like a security panel. The tricky thing was, the media player has an oval shape to it. It just couldn’t be square, no. The thickness and the diameter of the round ends were just a little bigger than a half an inch too. It couldn’t be a half inch, because I have router bits that could cut that. Nope, it was bigger, so it meant two passes with the router, which makes it much harder. I hit it perfectly though. Just look at that. You couldn’t get a piece of tissue paper in there. It looks like it belongs, but to be honest, it took two tries. It fits so snug, that I really didn’t need much to hold it in place. There wasn’t any good place to attach anything, so I just opted to glue a piece of wood next to it, and just use some gaff tape. It’s not going anywhere, and it can be removed and replaces. The blue light, well, that’s just a blue light. Just for looks.

Zombie Door Panel Zombie Door Panel

So that’s it. That’s how it works. That’s how I built an Animatronic Zombie Door. A video plays on a monitor from a media player. From the monitor, the audio goes to a sound system and to a DTMF decoder. When the decoder detects the sounds, it tells a Picaxe chip to activate relay switches. Those relay switches turn on motors, lights, etc. A piece of cake.

Hope you enjoyed this, got inspired, learned something, all that stuff.

Randi Rain

Teleportation – or – Pop Haydn is cool.

I thought I would go old school with the title of this blog, like old movies that used to have two different titles. The perfect way to show the content, and it helps in all this SEO stuff that I don’t understand. Well at least I hope it does. Like I said, I don’t really get it… but I can build a teleportation device. A nice one.

The story starts back many years ago. Back when I was doing this show at this restaurant. It was a parlor type show that I would do once a week, and we are talking about a place that has the word “shack” in it’s name. It wouldn’t be unusual to have a bunch of drunk guys there that would rather watch a football game. The only reason I did it, was because it was a challenge. It was a real challenge. Sometimes you had to go to extremes to get their attention. I also used it to try out new material, since I wasn’t get paid for it, just tips, which I got. Another problem was that when I would get families in there, they would tend to start coming every week, so I always had to have new material for at least a thirty minute show.

One time, out of desperation, I built a teleportation device and used it one time at “the shack”. Yes, I did it without purchasing Pop Haydn’s DVD, and that was wrong of me, do as I say, not as I do… But! I only did it to test the waters, and for no bad reason, it didn’t work out. It never made it into my act that I get paid for, and I never did it again, but it was the beginning here. The teleportation device I built then, ended up being the one I built now.

The first one I built was made from brass plate that I bended and soldered. The only real reason I used brass was because I had been using it for other projects. Matter of fact, my animatronic frog mechanics are made from brass, and built around the same time I built the first device. Five sides of a brass box were made and the front was just a piece of wood. There was a brass tube sticking out with a glow plug and an alligator clip at the end. I made a feedback circuit to make noise and had some switches for the glow plug, lights, and a potentiometer knob to control the noise maker. It was whipped together real fast, and was used once. Then it was thrown in with all my other stuff. Then it was scavenged and parts were used elsewhere. To it finally becoming a shell of it’s once self, in a box in storage.

Skip to today. I am performing at AbraCornDabra this year and I have a brilliant idea for a routine. I have everything worked out except for one spot. I thought maybe I could fit the teleportation device into that spot. So this time I bought Pop’s DVD and went and pulled out my old device. What was left, was the brass box with a brass tube soldered to it, and the wood front with two push buttons left and the potentiometer with knob.

The first thing I did was to make another noise maker. My first one was just a transistor circuit I put a speaker to. It was crazy. The noise changed even pushing buttons that weren’t even hooked up to it. The feedback was crazy, even putting your finger on the plastic knob and taking it off changed the noise. Weird. This time I wanted to build a better one. So I googled “DIY Theremin”, and I found a make it yourself project that made a Light Theremin. It was a simple little circuit that uses a 555 chip, which I have and use for other things. The circuit senses light by a photoresistor, so I just changed that to a potentiometer. That gave me the perfect sci-fi noises. I also added an extra resistor into the circuit and connected it to one of the switches. That made the noise shift in tone drastically, but technically it’s the same thing as turning the knob really really fast. I also added an amplifier circuit to it to make it louder.

Once that was done, it was time to use another PicAxe chip, my favorite. People can say what they want about other programmable boards, but I am not building satellites or anything. I just need to light some LEDs, or move a servo, and with the PicAxe chip, I can do that easily with a language that I learned over thirty years ago. For this I used a 08M2 chip and made the pins go high and low in set patterns that I could change by putting a charge on another pin. The output pins, I just hooked the LEDs straight to them. The output charge is easily enough to light a LED. I even put a 100 ohm resistors between the pins and LEDs to protect them. Then one of the buttons is connected to the input pin. So every time you push the button, the LEDs change to a different pattern. There are five total patterns, but I could always pop out the chip and program more.

Now it was time to build the section the LEDs were going. I knew I wanted to hint at old school technology, even a little bit of Frankenstein, which nothing says that more than clear disks stacked up. Plus I wanted to dilute the look of the LEDs as much as I could. That’s why I went with amber LEDs too. I had some half inch plexiglass already, I just needed to cut disks out and round them over. A hole saw would work perfect for that, but I didn’t have the right size. I should have went and bought one, but instead I decided to just use my router. Big mistake, I paid for it. Between the plexi blocks getting locked up in the drill press and spinning out of control with the router, my fingers are chopped up. A cut edge of plexiglass isn’t very forgiving. It can tear right through skin.

I finally got my plexi disks and I stacked them up on the brass rod with painted spacers in between. The spacers are wood actually, but coated in plastic and painted to look like ceramic. It was spacer, instal the LED, plexi disk, spacer, LED, etc. Then I topped it off with brass rods bent and soldered into prongs. I didn’t want to go use alligator clips. In between the prongs I installed a glow plug, and with that, it is done.

So I get Pop Haydn’s DVD. I had to work out a way to play it. I had to find my old DVD player and get it working. I watched the video of his performance, which was very funny. Then I watched him explain it, and then I watched him talk about building them. He named off some builders that could build one, and lo and behold, he mentioned me. I was honored. Then it showed pictures of other peoples devices, and it showed one I built for someone else with my website on it. I was honored again. Then when I posted on facebook that I purchased the DVD and was building a device, he emails me and gives me permission to make them to sell. Honored again. Like the title of this blog… Pop Haydn is cool.

Unfortunately I don’t think I am even going to end up using it, because the act is evolving again.

Teleporter Teleporter

Animatronic Love

Ever since I can remember I have loved animatronics. Even the cheesy ones. Even as a kid, I loved them for the combination of machine, art, and life. I used to love to go to Chuck E. Cheese and Showbiz Pizza. I was a child that would actually sit there and watch those animatronic shows and not run into the game room. Even to this day, I love them. I rode the mount everest ride at Animal Kingdom, even though roller coasters make me sick, just to see the incredible animatronic yeti that is there. That thing was cool, and afterwards, I literally had to lay down I was so sick. That thing goes backwards in the dark. Not something somebody like me should be riding.

My first animatronic creature I built, that I can remember and actually classifies as one, would be the piano player I made. I was going to build a band like Showbiz Pizza had, but in miniature. I got as far as the piano player. It was made out of popsicle sticks. The body was anchored on a shoe box, and the arms were hinged to the body. I had a little DC motor inside that I had glued a piece of popsicle stick to. When the motor spun, it hit the arm sticks and it made the piano player play. Funny thing. I can remember the only paint I had was black and red, and that’s what I painted the cardboard piano I made. I remember thinking that it looked satanic. It looked like something from some campy satanic Hammer film movie. Maybe that’s why the others never got made. I was also in elementary school.

The first real one I attempted was when I was old enough to be on my own, but not old enough to get into bars and drink. I had an old Tandy COlor COmputer 3 from my childhood that I actually used. I build a dinosaur type creature. The movements were his head left and right, and up and down, his tail left and right, and his eyes blinked. It was pretty funny. I built the framework out of pvc pipe and connections. The movements were done by gear motors. They were turned on by a pulse counting circuit board I invented myself. The pulses came out from the serial port that I would turn on and off with POKEs. That’s a piece of code you only used if you knew what you were doing. I used the potentiometer joystick inputs geared to the motors so the computer would know where the movements were at. I built the entire thing and made it work, but I never got around to putting skin on it. It was always a pvc frame of a dinosaur that moved, and blinked. Good times.

My next adventure in animatronics was in my twenties when I lived in Hollywood. I had my little shop set up in the garage and I was learning how to braze steel. What should I make? Of course, I decided on something animatronic. It was actually an automaton in my opinion. Since it wasn’t programmable, it did the same thing over and over, but whatever. It was steel rods welded together. Very basic, but I wanted the arms to be more than just planks lifting up and down. So I hinged the elbows and ran a push rod that made them bend when the arms went up. I turned it into the grim reaper. When I moved from Hollywood, it ended up in a shed for almost twenty years. I just recently pulled it out and fixed it up. Works better than ever now.

Grim Reaper Grim Reaper

The next time I decided to build an animatronic creature, I wanted to do it right. I wanted to do it the way Disney pioneered. Not the fancy stuff they have today, but their original technology. It uses DTMF tones. What are those? You have heard them many times. They are the tones on your phone. It stands for Dual Tone Multi Frequency. There are actually sixteen of them. You have your ‘0’ through ‘9’, and you have your ‘*’ and your ‘#’, but there is also ‘A,B,C, and D’. There is a chip made to detect these tones, and you can buy circuits ready to go that use them. Each tone gets tied to a movement. Then you can record the tones that make up the movements and play them repeatedly. Since the tones are all on one track, you can put that track on the left side, and you can put the audio for the creature on the right side. The tones and audio can be a mp3, CD, tape, it doesn’t matter, because all of the movements get controlled by sound.

I built an animatronic frog. It used four servos. One for the eyes. One for the mouth. One to tilt the head left and right, and one to move the head up and down. Three of the servos are all inside of the frogs head. I gave each one three different positions. The eyes, left, right and center. The mouth fully open, a little open, and closed, and each head movement is broken up the same way.

I first built the control circuit out of a Basic Stamp 2 and used the Rainbow DTMF Electronic kit. The DTMF circuit would send signals to the Basic Stamp and the stamp would move the servos accordingly. It worked great, but it did have one flaw that bugged me. It was very linear. The Basic Stamp uses a step by step basic language, so it could only do one movement at a time. A tone would signal a movement, and you had to wait until that movement was over before you could signal the next one. It was really limiting. I never thought about it while I was building it. That’s kind of why I never did anything with it. From there it got sat on a shelf and never touched. Until recently.

Since I pulled my grim reaper out and fixed it up, I might as well fix up the frog. So I decided to redo the electronics. This time, instead of one big chip, I have four smaller chips, one to control each servo. This way they can work independently and each movement doesn’t have to wait. This time I used PicAxe chips, which I have become accustomed to. I still used the same DTMF circuit. I also fixed some broken parts.

To program the movements, I have found that the best way is to use Acid Loop Base editor. It’s usually a program that you can use music loops to make songs. If you just load each DTMF tone in the tracks, then you can draw in on the timeline which tones to play. You can bring in the audio track and have it in the timeline and export it as a single music file with the audio on the left side and the tones on the right side. Then you can play the music file from anything.

Acid Clip

I named my frog Bill. His name is Bill Frog. I still don’t know what to do with him except just play with it. You would think there would be something I can use him for. If I had a whole bunch more of them, I could open an amazing restaurant.

Electronic Russian Roulette

There was two questions asked to me lately that stuck with me. One was, “Why the hell would you make something like that?” The other was, “What do you do for fun?” These two questions are, in a way, the same question. I think I should start with the latter question first. That one actually answers the first.

The question was brought up by a friend who didn’t want to drink alcohol anymore, and he was trying to figure out what there is to do, as an adult, that doesn’t involve drinking. The answer to that… well different people are going to have different answers. Some would of course answer with a religious activity, but we are actually talking about something “fun” to do. If fun didn’t matter, you could just clean. No, we are talking about something fun, but rewarding. So the real question is, what do you consider fun? And what can bring something for you?

My answer is, I build an electronic russian roulette game. What else are you going to do? No seriously, I have no idea. I can watch TV, but then the more I watch the more useless I feel. I can go out and be with people. That’s fun, but that doesn’t get anything done. There are many things one can do, but for me, they need a result. So, all I know to do is to stay busy. So that answers what I do for fun, and it answers the first question. I built an electronic russian roulette because I can, some kind of fun will be had from it, and what the hell else am I going to do?

I was bored over the holidays. When I get like this, I have to create, but what? Right now, I am dry. I don’t have any good ideas. That’s alright, because I had a run of clever ideas. I need to recharge. So when I get like this. It’s time make something out of the material that I already have. Spend no money. Turn the crap you have into some better crap.

Several years ago, a friend came over with a friend who was trying to make this stool that would shock the person sitting on it. He found this circuit online, bought it, and couldn’t figure out how to make it work, and that’s why they wanted me to take a look at it. The instructions were horrible. I didn’t know what it was saying either, so I had a closer look at the circuit. The first thing I noticed was that the circuit was not made for what it was being sold for. There were empty slots for other electronic parts on the board. It did something else, and someone just figured out it shocks the crap out of you. So they sold them online. I can’t find them at all now.

After understanding the circuit, I figured out how to make it work and I built them a shocking stool. As we were playing with it, all I could think of was, “why don’t I have one of these?” After they left, I went and found the website and ordered one myself. I also made a shocking stool. I used it in my act at one point, and had fun with it at parties. But it got neglected, thrown in a shed, and went to pot. The electronics still worked though, so it became material for the next project.

The idea of an electronic russian roulette just popped into my head. Probably because I have been doing more electronics lately. I programmed a 14 pin PicAxe chip to do the roulette game, and I connected the shocking circuit up to it. Then I put it in a box, painted it, and added some teasing labels to the LEDs. Then I had to test it. I had to keep doing it until it shocked me. It was nerve wracking but it finally worked.

Once finished, it was time to see who would do it. It’s really a study in psychology. Some people have no problem doing it. They will do it until it shocks them. Others won’t even think about doing it. We call those people wussies. Some will do it once, more than likely not get shocked, and never do it again. Some do it and get shocked. Some like the test of chance with bravery. Some don’t actually “like” it, but they understand the mental reward that you get. All to say, “you did it”. So push your fingers down on the brass pieces and take a chance. It’s a metaphor for life.

And if you want to know how bad the shock is… Well, do you know those toys that shock you? It’s worse than that. Do you know those electric fences? It’s less than that. Good luck.

russian roulette

Why does the Tamasudare cost $200?

It sure looks like $200 is that magic number for me. That’s the number that seems to make it worth building something for someone else. But why that number? Well.. Usually it’s not the cost of the materials that dictate the cost of something, it’s how much of a pain in the ass it is. So why does the Tamasudare cost $200? Here is why…

First, there are 56 sticks in a tamasudare. Each stick is 16 inches, and 5/16 of an inch in diameter. So the first stop is to the hardware store to pick up some dowel rods. They come a yard long, that’s 3 feet for those who don’t know. That means you are going to get two sticks out of one dowel and have a lot of paint stirrers left over. So you will need at least 28 dowels, but you better get at least 30.

You might as well have a seat on the concrete floor and get comfortable. You are not just going to grab 30 sticks and walk away. No, most of them are crooked as a corkscrew. Most look like Harry Potter wands. No, the best thing to do is to pull every one of them out of the bin and lay them on the ground. Go through each one, eyeing down the stick to see how straight it is. Go through them all and pick out the straight ones. You won’t have enough. So you will need to go through them again and pull the ones out that you can cut a straight piece out of. Then you should have enough. If not, you have to go to another store.

Once back to the shop, it’s time to start cutting. Now of course for a skilled craftsmen, this is no big deal, but to an amateur, good luck. Once they are all cut, it’s time to go through them and pull off that stupid sticker they have to put on every dowel. That’s right, half of your sticks are going to have a stupid sticker on them that you are going to have to use some chemical to get off. I hate those things!

Now it’s time to drill some holes. Each stick needs a hole at each end exactly the same distance from the end, and both holes must be parallel to each other. This will take a pretty clever jig to get perfect. This is where skill in woodworking really comes in to play. Holes in dowels that are parallel to each other is harder than you may think. I did come up with a clever jig to keep them straight. So I can bust them out pretty fast, but only thanks to my expertise.

Now that you have the sticks formed, it’s time to finish them. “Finish” as in a paint finish or a stain finish, or whatever finish you want. They have to be finished in some way. They also have to be perfect. This is a device where sticks slide back and forth through strings. They have to be smooth as a babies butt. Which means it’s time to start sanding. Sanding 56 sticks. They have to be smooth.

Once they are sanded, you can paint them. Seems easy huh? Wrong! How are you going to do it? Spray it? Brush it? Wipe it? It has to be  smooth. If you want it color, you will need to spray it, but how? Lay a dowel rod on the table and spray it. Then watch it shoot across the table like blowing on a straw. Hang it up? There are holes, but then they start swaying, and remember, you have 56 of them. Also, you’re spraying a broad cone of paint onto a narrow thin piece of wood. The majority of paint is not even hitting the stick. That’s a waste of paint. So you have to get the sticks close together so that the paint isn’t wasted, but you have to keep them from touching. Another jig is needed to hold them while painting. You can solve the problems, but it’s still very time consuming.

Now that they are painted, you would think you are ready to put it together… but no. Paint, stain, clear coat, or whatever you put on those sticks is going to “pop the grain”. That means the fibers of the wood are going to swell, contract, move, all while the finish is drying. It makes the sticks rough as a cob again. So now you have to go back and sand them again. You have to get finer and finer too. All the way down to steel wool. Now you can paint them again and hopefully you won’t have to sand them again, but you may. Fun fun.

Once you finally get the sticks finished, it’s time to put it together. Each stick has to be tied to next one… individually. That means over 100 knots have to be made. Each stick will need a piece of string through their holes. You better just get comfortable, because you are going to be doing this for a few hours. This is very very time consuming. There is also a certain way you have to do it, or you will make it even harder on yourself. 110 knots… 110 tiny knots!

Once you have tied all those knots, you need to put some glue on them or they will come unravelled. Then trim them all up and finally you will have one made. So as you can see, why does a Tamasudare cost $200? Because it is a pain in the ass to make, but oh how cool they are!! Is it worth it? For $200 they are.

Get yours here…

Tamasudare Magic Mat by Randi Rain

Tamasudare