What a cool project, and a nice story. I would imagine if you study this close enough, you could look into my soul. It all started with friends that own a portable haunted house. I won’t go into detail about it, because I don’t know how much they want me to expose, but they wanted an animatronic zombie door.
EDIT: They very much want me to let people know..
Amazing Attractions – The Haunted Halls / A Haunt For Hire
Okay, so that wasn’t a zombie. That was me, but that was just a test video for the door. Any way…
They showed me a company that makes these kits where you can make these types of doors, and other Halloween props. I’m not going to link to them, of course, but they do have very cool stuff. They showed me this one door effect they had and asked me how much it would cost to build one. As I looked it over, one thing was clear, the website doesn’t give you very much information. They don’t explain how anything works. You don’t really get all that information until you buy the kit. Because of that, and their prices, I would have to charge the premium to build one. As you can guess, it wasn’t a very appealing proposal.
Now of course I knew how all the animatronic props worked. I didn’t really need their kit to make one, but I did need to know more information on what I was getting before I bought their kit. Which was annoying, because that makes it really hard to give someone a price. So I decided to tell my friends how I would build one myself. My way works the exact same way as theirs does, I just used standard equipment and built the rest from scratch, and I am about to tell exactly how I did it.
One last thing before I tell you how I built the animatronic zombie door. The other company doesn’t want you to know. They are very vague on how it works. Other people have told me not to tell how I built it, but I disagree with the secrecy. First, the people who can build one already know how it works. I didn’t need anyone to tell me how they work. I have been using this technology for animatronics for a long time. Disney invented this stuff before I was even born. So, I am not giving anything away. I am just showing the behind the scenes, and everyone loves that.
The whole thing runs by the video that plays. The video is what controls everything. You program the door by the video. The video is going to be a zombie banging on a door. That video goes to a monitor that acts as the window in the door. The audio, of the video, is split up left and right. The right track holds the audio of the zombie banging and is meant to be ran into a sound system. The left side holds DTMF tones. The tones are how you program the door and what makes it work. For those who don’t know what DTMF tones are, it stands for Duel Tone Multi Frequency. Basically it’s a set of paired tones. Think of playing two notes at the same time. It’s a set of two notes played at the same time. Confused? It’s the tones your telephone uses.
The video is being played by a very simple HD video player that cost $30 on ebay. It allows SD card and USB input for videos and has HDMI and AV outputs. It’s actually a pretty neat little device. It does what it’s needed to do.
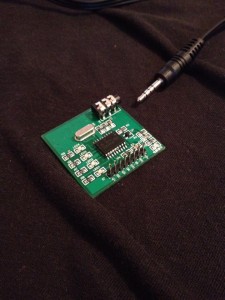
The DTMF tones on the left side of the audio track are used to control the animatronics. There is a specific microchip that is made just to detect the different DTMF tones. Companies take these chips and make DTMF decoder circuits with them. You can buy these things for under $20 on ebay. The circuit that I used had a 1/4″ audio socket for the input and needed twelve volts DC to power it. The output, from the detected tones, comes in the form of binary from four pins. If you know binary, you would know each pin has a high and low, which means two different states. So, that’s two to the power of four. Two states, four pins. That’s two times two times two times two, which is sixteen. Which is how many different sets of DTMF tones there are. Which means sixteen different controls are possible.
Sixteen? You may be thinking. “On my phone.. There is zero through nine, star, and pound. That’s only twelve.” Well, there is a rare A, B, C, and D too. The main thing to understand is that the output is going to be in binary. The four output pins are going to be going high and low in different patterns that will have to be parsed. Some DTMF decoders have this logic built in to evaluate the binary, but this one didn’t. I decided to make my own. I used my favorite way of programming electronic chips, and that’s the Picaxe chips. Cheap and easy to work with. I programmed the chip to detect six different binary patterns, because that’s all I needed. I also went with the easy ones. They turned out to be 1,2,3,4,8, and #. Those are the tones that I use to program the door.
So why six tones? Well, one.. the actual 1 tone, is used to turn on the siren beacon. The 2 tone is used to activate the left hand special effect. The 3 tone is used for the right hand special effect. The 4 and 8 tones turn on outlet sockets that can be used for auxiliary effects such as lights. The # tone turns all that stuff off and resets the hand denting special effects. All of that was programmed on the Picaxe chip.
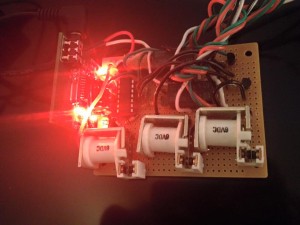
The activation of the siren beacon and the auxiliary plugs are turned on by relay switches. That’s what those white things are in the picture above. When the Picaxe chip detects the signal to turn on one of them, a pin on the chip goes high. This turns on a NPN transistor which turns on the relay. The relays turn on the beacon and the auxiliary plugs.
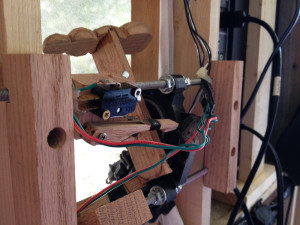
The denting special effect is basically an arm moving and stretching out a piece of spandex. The spandex is painted to look like the rest of the door. The arm that pushes out the spandex is connected to motors. The motors I used are car window motors. They are a worm drive system which makes them extremely strong. Easily powerful enough to push on some spandex. The arm has to go down and go back up, which means it has to go forward and reverse. This is accomplished with relay switches, which I will explain. It also has to stop at certain points, this is done with limit switches.
The easiest way to make a motor go forward and reverse, is to use a DPDT switch. A DPDT switch is a Double Poll Double Throw switch. It’s basically two switches in one, with two commons, two normally closed, and two normally open. Hook the motor leads to both commons of the DPDT switch. On the normally closed leads, make one positive and one negative. On the normally open, do the reverse. So, now the switch will make electricity flow one way, and the other way when the switch is flipped. DPDT switches can be manual, or they can me electric like the ones I used. Just like the relays that turned on the beacon, these turn the motor one way when on, and the other way when off. Here is a basic sketch of the schematics.
To get the animatronic arm to stop in the right spots, limit switches are used. On each side of the DPDT relay switch I added limit switches that break the current when pressed. That way, when the arm moves to the right spot, it hits the limit switch turning itself off. It won’t do anything until the DPDT switch is thrown the other way, which causes the motor to turn the other direction. This will let up that limit switch and stop when it hits the other one. A real simple back and forth movement.
 |
 |
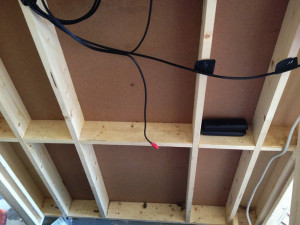
The basic structure of the zombie door is white pine 1×4’s and half inch MDF. A simple ‘two foot center’ frame structure was built with 1×4’s. The white pine is nice and light and plenty strong enough. Glue, always use glue. Glue every joint, nail it all together. I used a nail gun for the frame and a staple gun to attach the MDF. If you don’t know what MDF is, it stands for Medium Density Fiberboard. It’s basically wood made out of old other wood, and some other stuff. Who knows what’s all in it. It’s not unheard of to see a spark when cutting MDF. There could be bits of metal in it. There is actually different types of MDF, there are different densities. There is ultralight MDF, which is nice, because MDF is heavy. I have never seen ultralight MDF outside of Hollywood though. You sure can’t get it in Texas.
 |
 |
MDF can be painted to look like anything you want. MDF doesn’t have a grain to it. It’s nice and smooth and flat. You can paint it to look like marble, and it will look like a slab of marble. I, of course, wanted to make it look like metal. Ugly metal at that. This is the easiest paint job there is. It’s metal colors and dirt colors. You can’t mess it up. It’s the little details that you want to work on. Such as the rivets and the weld marks. I made the rivets. They are plastic that I poured and tinted with metal tint. The weld marks are just caulk. That’s my favorite. So simple. Just caulk and paint.
 |
 |
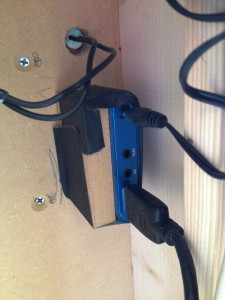
I built the media player into the set piece itself. The media player runs from a remote control. That means the media player has to be in a position able to receive the infrared signal. It also has to be accessible to plug the SD card or USB card into it. That meant I had to build it into the set. Since it is electronics, I needed to hide it in some electronics. I decided to build something that looks like some security lock or something. I went with the card swiping look. It’s just more MDF made to look like a security panel. The tricky thing was, the media player has an oval shape to it. It just couldn’t be square, no. The thickness and the diameter of the round ends were just a little bigger than a half an inch too. It couldn’t be a half inch, because I have router bits that could cut that. Nope, it was bigger, so it meant two passes with the router, which makes it much harder. I hit it perfectly though. Just look at that. You couldn’t get a piece of tissue paper in there. It looks like it belongs, but to be honest, it took two tries. It fits so snug, that I really didn’t need much to hold it in place. There wasn’t any good place to attach anything, so I just opted to glue a piece of wood next to it, and just use some gaff tape. It’s not going anywhere, and it can be removed and replaces. The blue light, well, that’s just a blue light. Just for looks.
 |
 |
So that’s it. That’s how it works. That’s how I built an Animatronic Zombie Door. A video plays on a monitor from a media player. From the monitor, the audio goes to a sound system and to a DTMF decoder. When the decoder detects the sounds, it tells a Picaxe chip to activate relay switches. Those relay switches turn on motors, lights, etc. A piece of cake.
Hope you enjoyed this, got inspired, learned something, all that stuff.
Randi Rain

