I used to play the guitar a long time ago, but was never really good at it. Then years later, I picked up the ukulele, and for some reason I was actually pretty good. I never really understood this until I came across Justin Johnson’s facebook page. He plays three and four string guitars, and even one string diddley bows. On one of his videos, he talked about how he was a professional guitar player before he even picked up a four or three string, and when he did, it made him a better player. He says it was because it broke habits. That makes total sense. It explains how I was all the sudden better. So he inspired me to make my own four string guitar, and this is how I did it.
The first thing I needed was the neck. Now you can buy necks already made, but I wanted a Fender clone, and that I couldn’t find. That meant I had to make my own, which I have never done. I also don’t have a plainer or a joiner, so I needed some flat stock that was ready to cut. Luckily, the place I buy my exotic wood from has just the thing. Belle Forest Products sells all kinds of wood, and wood cut especially made to make guitar necks from. I bought a nice people of maple and cut it out myself. It was already perfectly flat and square. All I had to do was cut it out. I used a band saw for the curves, a router for the truss slot, and a table saw for everything else. One technique for cutting non-parallel sides I used, was to run a piece of plywood through the table saw, but don’t move the fence. Then using double stick carpet tape, I secure the piece down along the cut edge, and run the plywood through again. It will cut exactly where you need it.

I purchased a neck truss off of ebay. It came from a Canadian company and is double action. It was something it really needed too when it came time to work the action of the strings.
The fret board was something I purchased, even though Belle Forest sells wood for fret boards too. I just didn’t have a way to make the cuts for the frets. It takes a really thin saw blade and has to be pretty precise. Other than the hardware, this was the only piece I didn’t make. Even though the fret board didn’t come with the frets mounted, and it was too wide. I cut it down to size using a flush trim router bit along the neck. The inlays were just holes drilled, filled with blue plastic, and sanded down. The truss rod was epoxied in at the ends, and the fret board was glued down. The frets were installed, and then sanded down flat using a piece of sand paper on a block of flat MDF. The neck doesn’t have a curve to it like some six strings do.
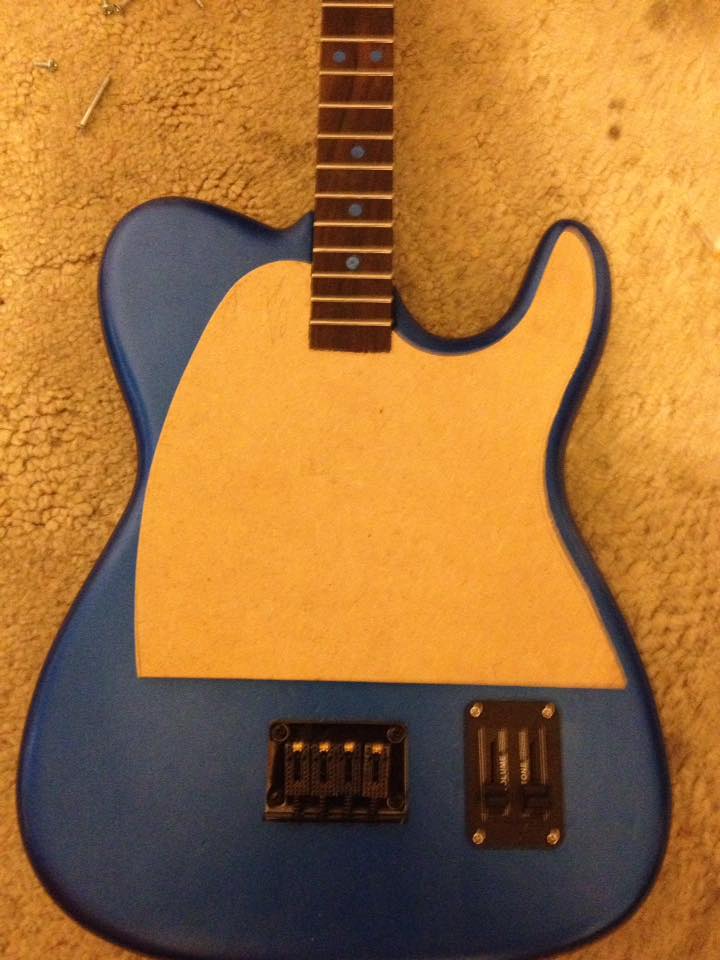
Once the neck was done, it was time to work on the body. A simple google search finds a Fender Telecaster template.

First thing to do was to cut it out on a piece of wood. I used a piece of 1/8″ craft plywood. It was cut out using the band saw, but that was hardly perfect. Once cut, it takes a lot of sanding to get it smooth. This is why I used 1/8″. The thinner it is, the less you have to sand.
Once I had the smooth template, I traced the shape on several pieces of plywood, and a piece of 1/4″ MDF. I rough cut the pieces out, leaving the line. Then I used more double stick carpet tape to attach the template on them. With such a thin piece of plywood used for the template, I had to use some spacer pieces to rise it up. That’s because I used a flush trimming router bit to finish the job. It had to be bumped up so that the bearing could ride against it and still cut the wood.
Once the pieces were cut, I cut out the center plies that would house the electronics, and the sections that would hold the neck. Then I stacked them all up, with the 1/4″ MDF on the face, and I glued them together under pressure. Once dry, I used a round over router bit all the way around.

I really hate sanding, and I didn’t even want to try to get the edges of the plywood smooth. So I covered the entire piece with resin. This was just fiberglass resin. It soaks into the wood and makes it way more easier to get smooth than raw end grain wood. I learned from the electric ukulele, that I built, that it most definitely needs a primer. Paint doesn’t want to stick by itself. It was primed and painted with automotive paint from O’Reilly’s Auto parts. They have spray can lacquer.
At this point, there was just one more part of the body to make before it was time to install the hardware, and that was to make the pick guard. Since mine was going to be a four string, and the neck was thinner, I shrunk the size of the body to match the scale. That meant I couldn’t just buy a pick guard. My color scheme was black and blue. I purchased some blank pick guard material from Stew Mac.
The pick guard had to be a half inch smaller all the way around than the body. There is a really simple way to do this. First thing, was to make a copy of my body template on another piece of wood that was 1/4″ thick. I did this just like I did the body. Rough cut and flush trimming. Then I took a dado router bit and I cut a half inch dado around the piece of wood. Then I used a flush trimming bit to remove the dado, and TADA! The body shape that was perfectly a half inch smaller all around. Then just more double stick tape to hold the blank pick guard down, and I flush trimmed it out. Then I chucked up an angle bit, and I put a small bevel on the pick guard before I pulled it off the template.
 |
 |
One more thing I had to make, and that was the nut. I didn’t want a white one, it had to be blue, so that meant making my own. To do that, I modeled it on the computer. Printed it out on my 3D printer. Made a mold of it, and cast it in blue plastic. Probably the easiest part, and one of the coolest. Everyone asks where I got it from.
Now it was time for the hardware. Where do you get parts for four string guitars? Believe it or not, there is a company just for that. It’s also where I got the fret board from too. It’s a place called MGB Guitars. They have some really nice pieces, and they’re not that expensive either. Along with the fret board, it’s also where I bought the humbucking four string pick up, the bridge, the electronics, the jack, the tuners, the strap knobs, and really cool string retainers. I am all super happy with their products. The only thing I didn’t like, was the look of the pick up. It sounds great, but it’s uglier than homemade soap. It kind of looks like wood, so it kind of matches the maple neck, but it’s still not my favorite part.
That’s it. I hope this helps anyone that wants to build their own, or anything similar.
